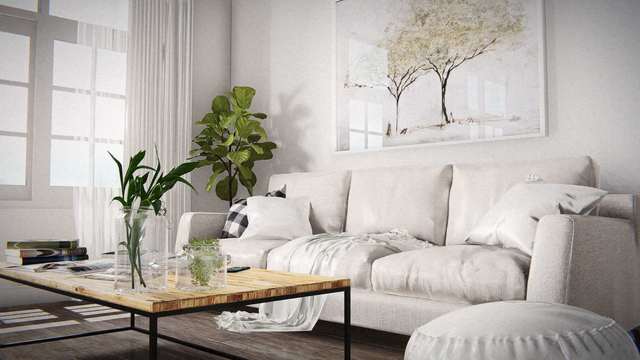
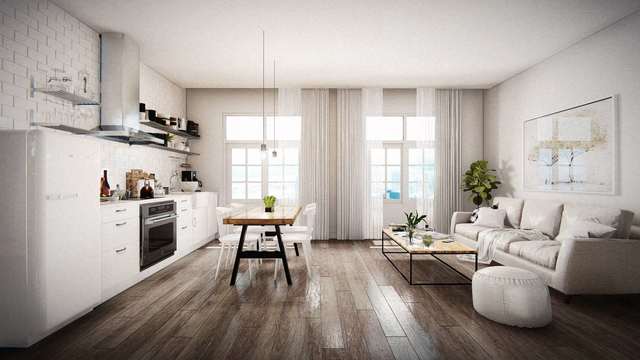
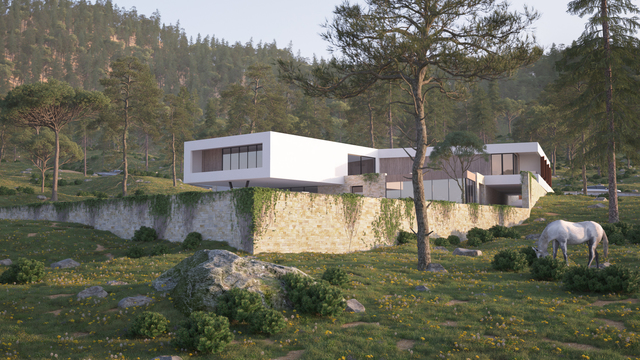
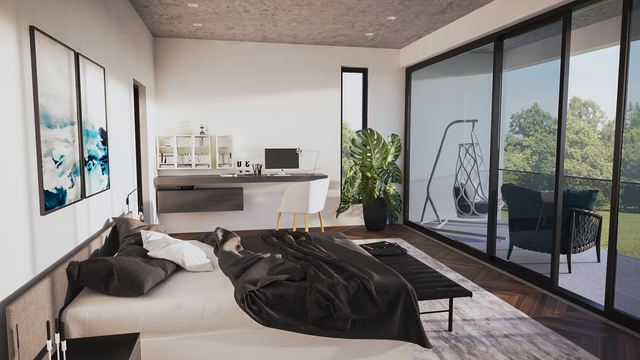
Businesses today can create product images and marketing material using 3D rendering. 3D rendering in many industries such as architecture and interior design is replacing traditional photography. Before 3D rendering, product images would be created through photoshoots.
These photoshoots could be expensive and time-consuming. 3D rendering opens up a new range of possibilities and allows businesses to improve their efficiency. Furthermore, it often provides a reduction in costs.
To create photorealistic renders, however, businesses must have advanced knowledge and a great understanding of rendering software and its capabilities. This is why it can prove beneficial to hire a 3D rendering specialist. A freelance 3D rendering service will understand exactly how to create a photorealistic image. Furthermore, they can provide advice and help your business develop effective product images.
If you want to understand more about rendering and how to create photorealistic images, we can help. We have created an extensive list of 18 tips for 3D rendering with photorealistic results. These tips offer simple but effective advice that should greatly improve your understanding of photorealistic rendering. Read on to find out exactly how to create epic 3D renders.
Why Is Photorealism Important in 3D Rendering?
First, let’s look at why photorealism is important. 3D rendering aims to turn 3D models into advanced 2D images. These images are often used by businesses in marketing, promotions, and new product releases. The images must be fantastic quality and look superb. More importantly, they must look realistic, true to real life, and like an actual photo. This is what photorealism achieves.

Imagine your business is launching a new car model. It is still in the development stages but you want to release promotional images. Creating a 3D render that has minimal details and textures would be poorly received. The car would look artificial and wouldn’t gain the reaction you wanted. Alternatively, using a photorealistic rendering service could create an immense car model that was indistinguishable from an actual photo. Customers can clearly understand the design of the car and the features it has.
Photorealistic renders offer a cheaper alternative to photography with no reduction in quality. Businesses can create realistic images using 3D rendering with less effort and cost. The results look superb, and rendering also offers a high degree of versatility.
18 Tips for 3D Rendering with Photorealistic Results
Now that you have a clearer understanding of photorealistic rendering, we can look at the tips. We have included tips relating to software, preparation, lighting, external factors, and textures. These tips are straightforward and a 3D rendering specialist should know them already.
- Ensure You Have a Sufficiently Powerful Computer
3D rendering requires an extremely powerful computer. The software used for 3D renderings such as SolidWorks and Blender requires great processing power. This is due to the complex rendering processes and advanced algorithms involved. Creating a final render, for example, is a lengthy process—each frame of the scene has to be rendered.
If you are using the services of a 3D architectural rendering company, they will have their own equipment and software. However, if your business is undertaking the rendering, you must have a high-performance computer. This computer should have an adequate:
- Multi-core processor
- High-speed RAM (memory)
- Graphics card
- Hard drive space and transfer rates
A high-quality multi-core processer is essential so that the rendering software runs smoothly. Furthermore, the multi-core element allows multiple tasks to be performed without sacrificing speed. To complement this, it is advised to have at least 32gb of RAM. Moreover, a high-quality graphics card with its own RAM is a must. A powerful graphics card such as a model from NVidia ensures your computer can cope with the rendering display.
Finally, the device must have a high-speed hard drive with plenty of storage space. This might seem like a great expense, but it is a necessity to effectively run 3D rendering software and create high-quality images.
- Use the Latest Version of Your 3D Rendering Software
Aside from owning a high-performance computer, you must also have licensed 3D rendering software. There is a host of different providers such as Maxwell Render, Blender, Maya, Keyshot, and 3ds Max. Not only must you own a license to the software, but it is advisable to ensure it is regularly updated.
Software such as this can sometimes have bugs and errors. This could cause problems with the rendering process and your ability to create images. Some bugs are small and cause little to no issues while others can have severe consequences. To fix errors, software developers frequently release patches or new product versions.
RELATED: Hire an Architectural Freelancer – 3D Modeling & Photorealistic Rendering
Patches are usually small updates that fix bugs. New product versions are usually larger and can include new features. It is important to ensure your 3D rendering software is up to date. Some software automatically updates. Others, however, require that you check with the 3D interior rendering services website for updates. Keeping your software updated ensures your rendering processes run smoothly.
- Use High-Quality Reference Material
Reference materials are physical objects or digital media that you use to draw inspiration from. This is standard practice for 3D rendering and other types of digital work such as 3D modeling. Let’s say, for example, that you are creating a 3D render of a dining table chair. You could look at other chairs for inspiration. You could look at the different materials used, how shadows and lighting affect the surfaces, and even common sizes and specifications.
Gathering a wide range of reference material to draw from is vital for 3D rendering. It helps you create realistic images based on real-life objects. Obviously, you cannot copy this material and directly plagiarize other work. Reference material is meant to be just that—a reference that you can gain ideas from.
The more reference material you can gather, the more realistic your image will be.
- Ensure Scaling is Correct to Real-World Measurements
While reference materials help improve realism, so does scaling and measurements. Consider this—would you create a chair that was vastly larger than a table or kitchen workstation? No—this would look ridiculous and wouldn’t work as a product. That chair should have realistic dimensions that reflect its size in relation to a table and other similar size objects.

This is achieved through scale and the inputting of accurate dimensions when creating 3D renders. Scaling is hugely important—it is one of the simplest things you can do to ensure your 3D render looks realistic. This is one of the first things you should start with—the basic scale and size of the objects within the 3D render.
If you are creating a product render, the development team should have already given you measurements to work with. Alternatively, if you are creating a 3D render from scratch, use common sense and think of the scale of the object in a real-world scenario.
- Look at Camera Angles and Composition
Comparisons between 3D rendering and photography are often made. These comparisons are well-founded because a 3D render is just a CGI photograph. When taking a photo, what is one of the first things you look at? Composition, angles, and perspective. These techniques also apply for photorealistic renders.
The composition is how you frame the render—what is included within the scene? What is present in the background? What perspective are you viewing the scene from? Experiment with different compositions to improve realism.
For example, you create an architectural render of a building interior. Consider angling the render, so that glimpses of the outside world can be viewed—through windows, for example. This helps the viewer place the building within a real-world setting. Moreover, it helps provide context and scale.
As photorealistic renders are created from 3D models, there is a limitless possibility to change the viewing angle and composition. Don’t simply stick with a standardized side view—look for angles that enhance realism.
- Start with a Simple Shape and Build It Up
When creating a 3D render, it can be tempting to start with a complex mesh model and expect to produce fantastic results with minimal effort. The opposite is true, however. It is a well-known fact that starting with a simple shape is much easier. It is easier to create a simple shape when rendering, and remove sections of it to create the final piece.
Curve lines and correct proportions of the shape should be the initial concentrating point. Furthermore, unwanted parts of the shape can be later cut out. The basic shape of the object or 3D scene is important as it defines the render.
Let’s say, for example, you have an interior of a kitchen. To start, you could define the flat walls and working area. Next, you could create the basic shapes of the equipment such as worktops, cupboards, and white goods. From here, you would add detail to these items and shape them properly.
- Keep the Basic Mesh Clean and Low-Poly
A 3D render is composed of a basic mesh model. This is like a wire-frame construct that shows the basic outline of different objects within the scene. Mesh is an essential part of 3D rendering. A clean mesh with a comparative low-poly ensures that the overall scene size is lower. What does this mean?
It means that complex models and 3D renders are easier to work with and do not require as much processing power. In addition to this, it means that your 3D models can be adapted easier to a variety of different situations. There is a range of modifiers and software features that can help in the production of clean meshes.
- Understand the Basics of Lighting
Lighting is one of the most important aspects of creating photorealistic renders. If we compared a high-quality render to a low-quality alternative, lighting would be a key indicator. If you have a basic product model, how can you make it look realistic? By adding lighting effects.

Lighting is a natural thing—it is present all around us. There are natural light sources such as sunlight and reflections. Furthermore, we have a myriad of man-made light sources—lamps, smartphone screens, ceiling lights, and torches, for example. It is important to understand how lighting works and what effect it has on objects.
Lights cast shadows. Lights also affect colors and the perception of objects. To create realistic renders, you must effectively convey light and how it interacts with the object. Without lighting, a 3D object appears flat, without depth, and dull. Effective lighting adds a whole new level of depth to a 3D render and is one of the main features that sets a quality render apart.
- Use Multiple Light Sources
Building upon the above point, when using lighting to improve 3D rendering, it is important to use multiple light sources. The light source is the point where the light shines from—this affects how the light reflects onto an object, and conversely, the shadows it makes.
RELATED: 3D Rendering: 15 Reasons to Use 3D Photorealistic Rendering at Your Furniture Company
While a single light source can greatly improve the realism of a render, multiple light sources can take this one step further. Consider this—let’s say you have a new car model. If you placed this car in a real-world situation, would it only interact with one light source? No. If it was a night-time setting, there would be street lights, moonlight, and the interior lights from the car itself.
This is why multiple light sources are vital. They add depth but also help 3D product modeling services convey 3D renders in realistic settings with scientifically accurate lighting. If you had a car on a road awash with sunlight, there would be multiple light sources. First, the sun itself would create reflections and shadows. In addition to this, the sun would create reflections on the road, which would also reflect on the car.
- Consider Horizons and External Lines
This applies mainly to structural renderings such as a 3D architectural rendering freelancer or interior design, but it’s a highly useful technique. When developing 3D renders, consider the horizons. Any horizon shown within a render must be aligned properly. If you take a photo of a beach and the sea, would you take this at an angle so that the horizon tilted at 45-degrees? Of course not—this would look unnatural.
The same process holds true for 3D rendering. If you created a building interior, with a clear view of the outside world and a horizon line of trees, that row of trees should be horizontally aligned. Anything else would make the building interior look unnatural and like it was sunken into the ground. Horizons matter and people notice them!
- Utilize Advanced and Realistic Textures
A large part of the 3D rendering process is adding textures to objects. Consider again the real-life application. Any object or surface usually has some form of texture. The following are some examples:
- Sand grains
- Patterns in metal
- Grain on wood
- Bevels on wallpaper and plastering
- Loose strands on fabric
The possibilities are endless. Practically any object or surface has a texture—even smooth surfaces have microscopic textures. It is important to convey these textures effectively. Different rendering software provides photorealistic texture packs and libraries. For example, a program could have a metallic texture pack containing different metal surfaces such as silver, iron, steel, and copper.
Utilize textures to give objects within 3D renders realistic surfaces. There is nothing worse than seeing a 3D render that contains objects that have a single fill color or plain smooth surfaces—this is not realistic! Would a wooden table have a smooth surface with a single shade of brown? No, it would have grains, knots, and other textured features—ensure these are conveyed in renders.
- Play with Depth of Field to Create Blurred Backgrounds
This is another photographic technique. When creating photos, a photographer can adjust the aperture. This affects the size of the “hole” that light is let through onto the camera sensor. This affects the depth of field and exposure. A shallow depth-of-field means that the subject is in focus, but the surrounding background is blurred. Conversely, a wide depth of field means that the subject and the surrounding objects can be in focus.

Using depth-of-field is an effective way to convey realism in 3D renders. This technique should be used specifically with single objects and is an effective method to create product renders. If you are concentrating on a single object, consider blurring the background scene. This mimics a shallow depth-of-field that would be gained from a large camera aperture.
Furthermore, this also mimics what our eyes would see. If we look at a single object, do we see everything in focus? No. Our eye is only capable of seeing that one object in fine detail (depending on how close we are to it). By using the depth of field in rendering, we can create realistic photographic effects.
- Pay Attention to Small Details
People pick up on small details. Small details matter. This holds true for 3D rendering. You could have created an immaculate 3D product demo service design a render but have missed a simple texture or shading on part of the object. While the whole object may look superb, you can guarantee that people will concentrate on that small error—effectively the hard work you have completed is undone.
Small details are hugely important. This especially holds true if you’re creating product renders. Product depictions should be perfect. Every detail should be thought of. This is because clients could potentially pay money for your products—they want them to be perfect straight away.
The more detail you can include in a 3D render, the more realistic it will look. Furthermore, you will create a better-quality end-product that attracts a wider range of customers.
- Remove Hard Edges through Beveling
To create realistic renders, you must go right down to specific details as stated above. One important detail that people often miss or fail to understand is hard edges. We tend to create objects that have ultra-sharp edges—sharp to a knifepoint. A simple render of a book, for example. The book may have a hardback cover—this cover has straight edges and the corners are hard too?
But are they? If you look closely, is there a clearly defined hard edge? In most instances, no. The hardback cover of the book will have beveled edges, and the corners of the book are not truly intersecting at a 90-degree angle.
You must remember this when creating 3D renders. Add beveling to hard edges. This helps create an additional sense of realism. Furthermore, it creates an accurate depiction of what most natural and man-made edges look like. You may have never considered this pointer. Spend some time analyzing the edges of different objects and you will understand exactly what we mean.
- Use Natural Effects to Enhance Realism
3D rendering software often can create different natural effects. Weather conditions, shadows, and particle effects, for example. In the real world, these particles are ever-present. To help improve the realism of objects, it is important to add effects such as:
- Dust
- Water droplets
- Reflections
- Shadows
- Smoke
- Haze
These are just a few examples. Obviously, the natural effects used must fit the situation. You would not, for example, add smoke particles to a sofa—this would look strange! You may add water droplets on a card, for example, if you created a 3D scene with the vehicle driving through wet weather. Particle effects such as this can greatly enhance the realism of individual objects, but also the scenes they are set within.
- Utilize both Symmetry and Asymmetry
These are two important terms you will regularly hear when creating 3D renders.
Symmetry – when opposite parts align exactly along a central axis
Asymmetry – when parts lack equality or equivalence
When creating 3D renders, it is important to use both symmetry and asymmetry where appropriate. In real-life situations, objects are not always perfectly aligned. If you create 3D renders that have perfect symmetry in every way, the scenes will look unnatural and contrived.
Although they may look aesthetically pleasing, they may not depict realism. Therefore, it is important to add elements of asymmetry to your 3D renders. Asymmetry is natural—it happens all around us.
- Add Finishing Touches during the Final Render Stage
Once you have created a 3D render, there is usually a final render that finishes the image and converts it into a standardized file format. This process can be time-consuming which is why we mentioned investing in a high-quality computer.
RELATED: Why Product Design Services Use Photorealistic Rendering for Marketing New Products
The final render stage is also a great time to look for improvement and add finishing touches. You should look at the following before completing the final render:
- Scale and size of the objects
- Light sources and general lighting
- Shadows generator from lighting
- Textures and surface materials
- Colors
By looking at the above, you can fine-tune the render and ensure it is perfect. This is ideal before the final render as it can save time; although proof-checking after the final render is also advisable. As mentioned, the render takes time – if you must keep making changes after creating the final render, the process can son become time-consuming. This is why it is important to take advantage of and add finishing touches before this stage.
- Proof the 3D Render and Look for Mistakes
As with any type of work, proofreading is vital. Regardless of how careful and fastidious you are, mistakes can happen. This is human nature. Unfortunately, we cannot always be perfect. Imagine if those mistakes slipped through the cracks and poor-quality work was submitted to a customer? This would tarnish your business reputation and could potentially lose work.
This is why one of the most important tips for photorealistic rendering is to check your work and proof the renders before using them. This should be a simple process—once the final render has been processed, spend 10–15 minutes checking it over. Look at the fine details. Examine the shadows, textures, and lighting. Does it look realistic? Are there any small mistakes such as pixelation or incorrectly rendered shadows?
By undertaking a checking procedure, you can spot mistakes such as this and rectify them immediately. The beauty of 3D rendering is that changes can be made relatively quickly. The original file can be changed, and the image rendered in no time at all.
Take Your Rendering to the Next Level and Create Photorealistic Results
Hopefully, you have found these 18 tips beneficial. As you can see, there is a host of small processes you can undertake to create a photorealistic rendering. Textures, shading, and lighting are extremely important. These features give models depth and definition. Furthermore, proofing your work and tweaking small details ensures that the final render is perfect.
As we mentioned above, sourcing freelance 3D rendering services could be beneficial. Your business may not have the time, skills, or resources to put these tips to good use. Using a service such a Cad Crowd therefore to facilitate a freelancer render can pay dividends.
Furthermore, you can ensure the rendering specialist is creating the images you want as you will have a greater understanding of the processes involved. Get a free quote today.
