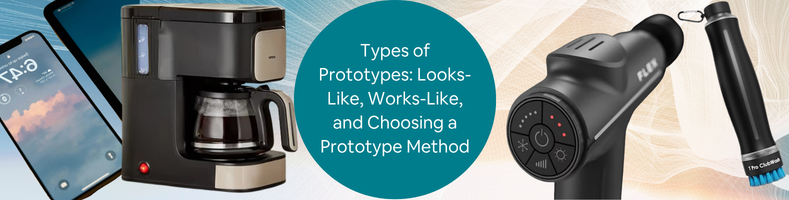
When you ask someone about the types of prototypes to build in an NPD (New Product Development) services, you may get different answers depending on who you ask and the design context. Generally speaking, and apart from the final production model, there are only three major versions: PoC (Proof of Concept), Looks-Like, and Works-Like prototypes. A PoC is the earliest form of prototype, typically made from off-the-shelf components. The idea is to validate the engineering aspect (more than the design) of a product using mostly affordable and readily available parts. It’s supposed to be easy and quick to fabricate, and yet it has to confirm that the idea really does offer a solution to a problem. Because in the vast majority of cases, you don’t build a new product if there’s no problem to solve.
For businesses that need help developing and refining these early concepts, Cad Crowd connects you with experienced product designers, engineers, CAD professionals, and 3D modelers who can support different stages of the new product development process. From validating an initial concept to preparing designs for prototyping and manufacturing, the right design expertise can help turn an idea into a workable product. For example, you’re making an electric nail clipper; no matter how you engineer the blades and the motor, it should be able to, well, clip some nails. That is the main functionality, but let’s say the problem you’re trying to solve here is the mess from the clippings.
So you engineer some built-in clever debris catcher to prevent the clippings from flying everywhere. The good thing about PoC is that it doesn’t have to look pretty. Don’t think about the aesthetics just yet. You’re allowed to experiment with an NFF (non-form-factor) model, which essentially is an oversized engineering sample used as an explainer to showcase the mechanism. If your PoC looks good, you’re thinking about it too much. The most rudimentary version, such as one hooked to a Raspberry Pi or Arduino, will do. And that’s about it for the PoC. Each subsequent iteration aims to improve this unit through looks-like and works-like prototypes, which will be the focus of this discussion.
RELATED: Designing Prototypes: 3D Design Services for Inventors and Companies
Looks-like prototype
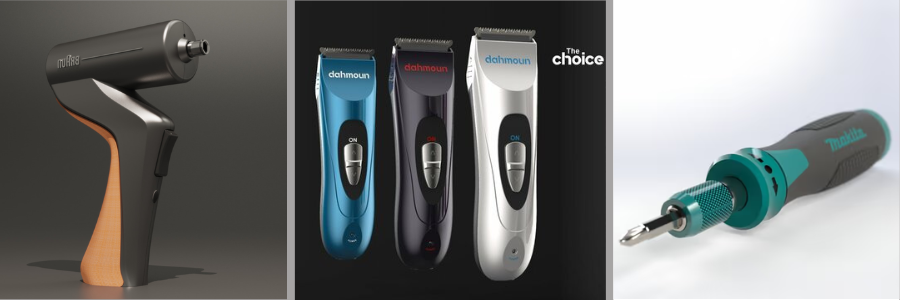
There’s no way you didn’t already create sketches and diagrams describing what the final product should look like. Some people go so far as to use 3D visualization services to draw the design, so they have at least some points of reference for the product’s form factor, dimensions, and colors. A look-alike prototype focuses on those aesthetic aspects. It needs to resemble the looks and feel of the intended product, period. It’s not made to function. Instead, it’s for appearance’s sake only.
Because a looks-like prototype is a non-functional model, it doesn’t actually do anything except serve as a preview of superficial perception. But this doesn’t mean the product isn’t real in any way. Quite the contrary, to provide an effective perception, a looks-like prototype must be built with true-to-life quality in mind. You can no longer use off-the-shelf parts or makeshift components made of plywood or styrofoam. The model must be fabricated using the same materials as you expect to use in the final product.
Say you want the electric nail clipper (at least the outer shell or enclosure and the blades) to be made of stainless steel with nickel plating, whereas the button is made of brushed aluminum. Remember, this is a looks-like prototype; the PCB and battery are not yet the main concerns. The correct model must replicate every aesthetic detail of the final product, meaning neither alternative materials nor subpar finishes are anywhere near good enough. Among the most common fabrication methods are CNC machining and 3D printing. Although 3D printing is commonly associated with plastic materials, the technology has advanced to the point where fabricators can now print parts from various metal powders, including aluminum, steel, titanium, and composites.
That said, CNC machining remains the method of choice for metal parts. And if the planned product will have plastic enclosures, 3D printing and vacuum/urethane casting should do the job well. Every method has its trade-offs in cost, finish quality, and fabrication time. So long as the prototype looks identical to the expected final product and can survive handling, it’s more than good enough for the purpose. A look-alike prototype is mainly used for aesthetic design validation before the work on the functional parts or the inner mechanism (in this case the PCB) is completed.
RELATED: What Are The Main Prototypes Used By Companies in Industrial Design Prototyping?
You might be able to use this as presentation material to pitch the idea to investors or perhaps customers, but beware of someone ripping you off. As a rule of thumb, you shouldn’t show a looks-like prototype unless you have a patent for it and are ready to launch. A design patent services professional can help. If you feel the need to showcase the design, make sure the audience is a person or a group you can really trust. The most important thing here is honesty about what the prototype represents. Just because the prototype might appear like a final product, never frame it as such. A potential investor and likely buyer will get confused the moment they discover that the model does nothing and quickly back away. Be very clear about what the product is and isn’t when presenting it to anybody outside the design team.
Works-like prototypes
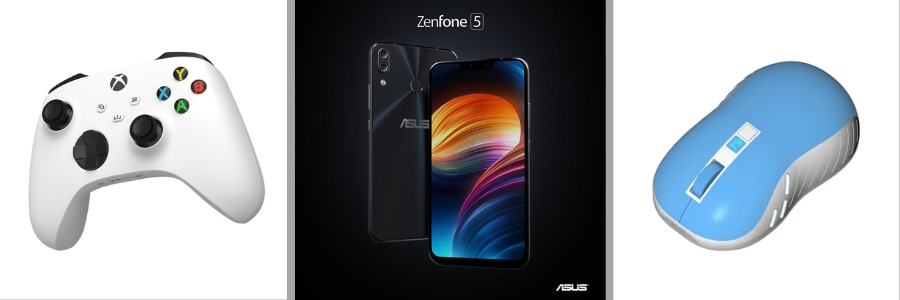
If a PoC is a rudimentary version of a product, a works-like prototype (also known as a functional prototype) is a much more refined model. The idea is that you take the PoC as the base reference and do a major overhaul to achieve a perfect fit within the look-alike prototype. This may sound like the looks-like prototype is already in its final state, but it really isn’t. There can (and will) be some changes along the way, depending on how well the functional prototype develops. You might need to move an opening a few millimeters to the right or left to fit a button, relocate a threaded hole to ensure enough clearance for the PCB, resize an opening for the blade mechanism (because of course we’re still talking about the nail clipper), and so forth.
Design revisions to the looks-like prototype should be minimal, but still revisions nevertheless. To assume there isn’t going to be any revision seems like an overly optimistic stance. A works-like prototype is supposed to demonstrate the product’s functionality and mechanical abilities. This is the part where you build a custom PCB, connect it to power (such as a battery or an AC outlet), pair the system with mechanical features, and eventually fit the entire electrical unit inside the enclosure. So far as the works-like prototype is concerned, it’s not entirely necessary to work with the aesthetic model right away.
There’s nothing wrong with external batteries, exposed cables, visible parts, and so forth. The primary objective here is to make the product work. The electronics work, the mechanism runs well, and the firmware does its job. The product development team then begins to put together all the components into an assembly that will fit into the enclosure, and this is where revisions to the aesthetic model can happen. Although both works-like and looks-like prototypes can be tested separately, you won’t be able to tell if the product “as a whole” works as intended unless you evaluate the complete unit. You can’t afford to subject the product in its final form to performance tests.
Say you want to run a thermal distribution test. Every electronic device, no matter how small it is, generates heat. In the case of an electric nail clipper, it draws electricity from a source (likely a battery) to power the motor that runs the blade. Heat is an inevitable byproduct. If the product gets too hot to the touch, it becomes uncomfortable to use and a safety hazard. Overheating can cause the device to fail, and in the process may harm the user. You don’t want any of that. The problem is that the enclosure itself may trap the heat, especially if it doesn’t have a wide enough opening to let hot air escape. At the same time, an opening that is too wide affects the aesthetics negatively.
RELATED: Adaptive and Iterative Prototyping: Iterate on Your Product Design With Industrial Design Firms
The electronic enclosure designer needs to establish a workaround for this issue that often leads to enclosure redesign; otherwise, the product won’t be safe to use. Let’s not forget that there are also tests for durability, reliability (an accelerated life cycle assessment to see performance degradation over time), and ergonomics as well. All of those require a complete unit, rather than a looks-like and a works-like prototype evaluated as separate models. For smart devices equipped with wireless connectivity features like Wi-Fi and Bluetooth, the enclosure (materials) might affect signal strength, so you have to test the products in their final forms, too.
There can be many failed units, but that’s the nature of prototyping. It’s an iterative process where the next build is always an improvement over the previous one. The final works-like prototype must be a proper blend of functionality and aesthetics, used as the basis for the production model.
Pre-production prototype
If you really want to stretch it, the works-like prototype can be followed by a pre-production model manufactured in low volume (pilot production). This is where you’re not yet fully committed to mass production but in need of a (relatively) small batch of units, mainly to validate the product’s manufacturability. For products made of plastic, the fabrication method uses “soft tooling” such as urethane injection molding and casting services, whereas metal products may utilize an aluminum (instead of hardened wear-resistant steel) mold. Think of soft tooling as the quicker and more affordable option than full injection molding without sacrificing quality.
Production quality is actually “near” identical between the two. The only difference is that the mold from soft tooling won’t last as long, making it suitable for small-volume production of anywhere between 50 and 500 units. As the name suggests, a pre-production prototype bridges the gap between functional and mass-production models. It’s the manufacturing method of choice for startups and small businesses as they launch a regional retail test, a crowdfunding project (such as Kickstarter or GoFundMe), or an e-commerce pilot launch.
RELATED: Complete Guide to Prototyping Methods Used in Product Development Services for Companies and Firms
Soft tooling is the economical path to hit the market. It allows you to conduct a real-world sales test on a small scale, gather real customer feedback, and generate accurate data. Going directly from a functional prototype to full injection molding can take tens of thousands of dollars and a high-volume production run from the get-go. While this is not impossible, the initial investment can be too much for startups and small businesses alike. In any case, there needs to be a proper handover of the prototype (functional or pre-production model, whichever you choose) along with the detailed design specification from the prototype tooling team to a contract manufacturer (this is your factory partner) for mass production.
Purposes of prototyping
In an NPD project, especially the kind where you develop something physical rather than an app or software, a prototype is the first tangible expression of the idea behind the product. A prototype is how you translate sketches, diagrams, CAD drawings, and 3D models into an actual object that you can touch, hold, feel, and sometimes smell. A visual prototype is also a prototype, but the usage scenario is limited to simulations in a digital environment. The data generated from such simulations, such as thermal management, fluid dynamics, and structural analysis, are always valuable, but at the end of the day, you gain all those insights to be used as the foundations to build physical prototypes.
And only with physical prototypes can you effectively track the development progress through a series of validation tests for the product’s prototype design engineering services, design, and production aspects. The validation tests serve as a pathway that leads the product through its varying degrees of maturity until it’s ready for mass production and market launch. In essence, a physical prototype enables you to put the product to the test in real-world usage scenarios, including production feasibility. If you have to discover mistakes, it’s best to do it while you’re still at the prototyping stage. You have to be sure that the product meets the customer’s needs, will function as intended, and is actually manufacturable. Once they’re validated, you can say the prototyping stage has met its every objective, giving the green light to mass production at scale.
RELATED: Prototyping Techniques Utilized for Complex Products at New Product Design Companies
Stages of product maturity
Product prototypes range from “low-fidelity” models made of foam and plywood to “high-fidelity” functional units. PoC is the only low-fidelity physical prototype, marked by its basic, rough, and often crude nature of the unit intended only to validate a product idea. It’s not even associated with any particular fabrication method; you utilize cheap, readily available materials and build it by hand or ask a handyperson to do it for you. High-fidelity prototypes may encompass both look-alike and works-like models. Because they’re supposed to resemble the product’s final form, whether in appearance or functionality, it takes some more specialized fabrication methods to build them.
Prototyping methods
There’s no single perfect prototyping method for every kind of product. It’s not a one-size-fits-all affair. You determine the most efficient way to build a physical prototype based on the product’s form factor, materials, functionality, and features. Among the most common fabrication methods for high-fidelity prototypes are as follows.
- 3D printing services: an additive manufacturing technology that “prints” an object from an STL file. While 3D printing is most commonly associated with plastic materials, the more advanced printers can also build metal objects. The printing technology comes in various techniques such as SLA (Stereolithography), SLS (Selective Laser Sintering), and FDM (Fused Deposition Modeling).
- CNC machining: a subtractive method where an object is carved out of a block of material. It’s primarily used for metal materials, but compatible with wood as well. Some plastics are actually rigid enough to be processed using the method, for example, ABS, PEEK, POM, acrylic, and nylon. CNC machining is very precise and can produce high-quality finishes.
- Vacuum casting: also known as urethane casting, is a cost-efficient alternative to injection molding. Instead of using hardened metals to make the mold, vacuum casting uses silicone. Like all casting, you need a master model, typically created using SLS or FDM. The method works best for plastic parts, specifically resin.
RELATED: How to Make a Prototype for Your New Product Design
For a simplified comparison between prototyping methods, please take a look at the table below.
| Prototyping Method | Material | Speed | Fidelity and Strength | Cost |
| 3D Printing (FDM) | Thermoplastics (PETG, ABS, PLA) | Very fast | Rough surface finish, unrefined quality, early models only | Low |
| 3D Printing (SLA) | Photopolymer resins | Fast | Good finish quality, ideal for presentation model | Low to Moderate |
| 3D Printing (SLS) | Nylon / Polyamide powders | Fast | Functional parts with good finishes | Moderate |
| CNC Machining | Production metals & hard plastics | Moderate | Maximum structural integrity, production quality finish | Moderate to High |
| Vacuum Casting | Polyurethane resins (to simulate production plastics) | Moderate | Low-volume production quality for plastic parts | Moderate (anywhere between $250 and $1,500 per mold, depending on part geometry and complexity) |
Certain high-fidelity prototypes can’t be built using only one fabrication method. If your product uses a combination of metal and plastic materials, for instance, chances are you need to tap into the power of 3D printing design and CNC machining to make a single prototype model. If the product is an electronic or electromechanical device, the PCB must be prototyped (often digitally) and custom-built as well.
Validation tests
No prototype is market-ready before the engineering, the design, and the design for manufacturability factors are validated. As a matter of fact, the ability to run the validation tests is one of the main purposes of prototyping in the first place. Bear in mind that the following tests require either a works-like or pre-production prototype.
RELATED: 10 Tips on How To Find the Best Prototype Engineering Firm Services
Engineering validation test (EVT)
The goal of EVT is to verify that all the technical aspects of the product work as intended. It’s a question of whether the product is usable and reliable. You’ll need anywhere between 20 and 50 prototype units to be tested in a controlled environment (for example, a laboratory or an enclosed chamber where you can simulate real-world scenarios). For instance, if you want to test the product’s water-resistance rating, there needs to be equipment to replicate a condition where the product is submerged at depths under specific water pressures.
You can, of course, test it in an outdoor environment such as a lake or a swimming pool. In the case of electronic product design services, the thermal and EMI tests are also performed during EVT. Some of the prototypes may fail. The electronics can go haywire, and the mechanical parts break. What matters most here is that you gather enough data to identify the points of failure, what causes them, and how severe the damage is. Not every product has to undergo the same EVT. If the product isn’t meant to be used in extreme environments, there’s no point testing under such conditions. For example, you wouldn’t want to test an electric nail clipper underwater.
Design validation test (DVT)
Once you’ve refined the prototype based on the results from EVT, it’s now time to run the improved model through DVT. This is the point where the prototype starts to become truly industrialized. If EVT is all about the functionality of a product, DVT takes matters into a more serious territory to include not only the working mechanism of a product but also aesthetics, performance, and safety standards. Plenty of tests happen at this point, including certification processes for electronics and medical devices. Think of FCC certification, FDA approval, CE marking, RoHS, UL, and the lot. If your product has nothing to do with electrical or medical applications, the design validation test isn’t going to be much of a hassle. All the tests and certifications in this stage require the product in its (near) final form. For electronics, that means both the custom PCB and the enclosure.
Production validation test (PVT) or pilot production
It’s worth mentioning that product concept design services may need multiple runs of EVT and DVT in an iterative process. If the first series of validation tests indicated some points of failure, you refine the prototype and run the same tests again. You repeat the sequence until everything is exactly as it’s supposed to be. PVT is the final step before mass production, aimed at ensuring that the manufacturing yields products that are identical to what the EVT and DVT suggest. Much about PVT concerns the development of hard tooling for injection molding.
RELATED: Does a Prototype Have to Work to Design a New Product?
You have to use injection molding for mass production because it remains the most cost-efficient method for high-volume manufacturing. That said, PVT is pilot production where you manufacture only a small percentage of the actual production quantity, say a thousand units. This is to make sure that every single unit satisfies all the quality requirements at a reasonable cost.
How Cad Crowd can help
An NPD project can go through dozens or more physical look-alike and works-like prototypes. And each iteration may require multiple rounds of alterations, refinements, and sometimes a major overhaul until you arrive at the ideal form. Much of the success of an NPD project depends on rigorous engineering and design validation tests, where you discover flaws and room for improvement to address between every iteration. The quality of the prototype itself also plays a major role. You can’t generate accurate engineering and design data without a proper prototype to begin with.
Cad Crowd is home to prototype design professionals specializing in 3D printing and CNC machining applications. They have the skills and experience to create precise printable (STL) and machine-ready (G-code or NC) files based on the product’s engineering and design requirements. Every project managed by Cad Crowd is protected under a legally binding NDA, so your ideas and designs are always rightfully yours without risk of IP issues when working with us. We can also connect you with reliable contract manufacturers for an all-around turnkey prototyping service.