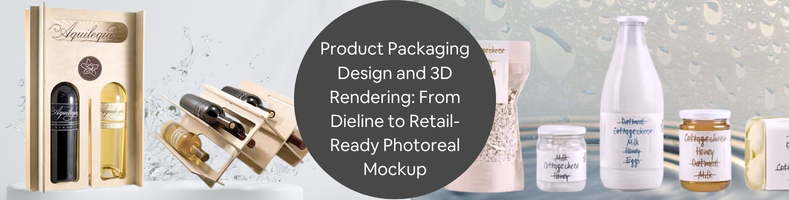
It takes a few key steps to create a realistic mockup of your products. You need to start with a dieline, which is basically the template that shows where you should cut and fold the package. The design will then become the basis for the 3D model. Artwork, finishes, materials, and colors are added to the model. The last step is creating a realistic image that you can use for presentations, retail marketing, and websites.
Since there’s no need for a physical product to see how the packaging will look, you can try various finishes, spot errors, and make the necessary changes before spending money on production. Cad Crowd can help you find 3D rendering freelancers who can create dielines and realistic mockups for your products.
RELATED: 3D Rendering for Product Packaging Design: The Full Guide for Consumer Product Companies
🚀 Table of contents
What is a dieline and why is it important?
The dieline is basically the product’s blueprint, as it shows where to fold, crease, cut, perforate, and glue the package. The designer may create a new packaging design based on the measurements of the product or use the packaging manufacturer’s existing dieline.
The dieline is crucial as the packaging serves as the product design and the product itself. The package shouldn’t hide important details once folded, like the barcode or logo. In other words, the package should look great and work as intended. Besides fold directions, cut lines, glue flaps, crease lines, and perforations, the dieline must also show the panel labels in order for the designer to know exactly where to put each detail or artwork. It also includes registration marks to help with production checks and material notes to specify the required materials for the package.
Why does structural design come first?
Structural packaging design services help ensure that the package can accommodate the product perfectly and that it can be assembled and transported properly. For example, your package may require a thicker board, larger flaps, or a different locking mechanism. Making these changes can make a significant difference once you finally start the production process for the package.
RELATED: Improving Packaging Design with 3D Product Rendering Services that Elevate Your Company Brand
Designers can use tools that are specially designed for creating packaging designs such as Esko ArtiosCAD. They can also use general 3D software such as KeyShot and Blender. Packly, BoxShot, and Pacdora can also help you create realistic mockups and visuals.
Whatever software you use, make sure that your 3D model is based on the actual dieline. The virtual prototype makes it easier to identify problems with the design. It also reduces production errors and waste of materials. After creating the 3D model, artwork can be added to the panels. The product information should end up where it must be once the package is folded.
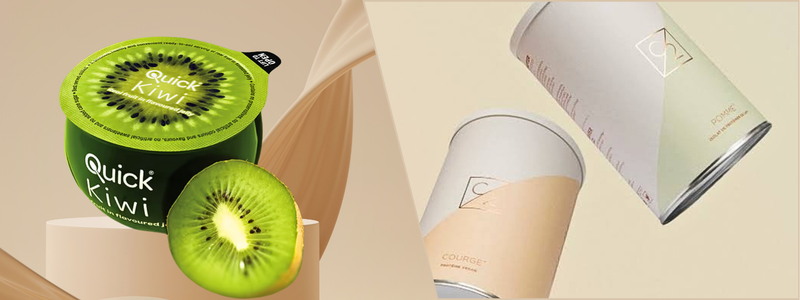
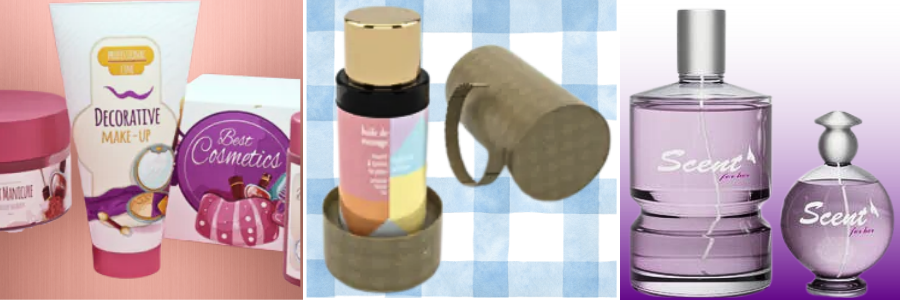
From there, choose the materials and finishes to make the packaging product feel more realistic and tangible. Different packaging materials can be chosen for the 3D model services. You can select glass bottles, metal containers, or paperboard boxes. There are several finishes to choose from. There’s gloss, matte, and embossing to help you make the product look and feel as realistic as possible.
RELATED: How 3D Packaging Design From Cad and Freelance Services Can Help Your Company Stand Out
You can use the image for different purposes. It can serve as the hero image of your social media page, online store, crowdfunding, or marketing campaign. A simple animation can also show how your product folds. The best part is that even before creating physical samples, you can start promoting your product since you already have the design.
Virtual mockups vs physical prototypes: which one do you need?
The answer depends on what you need and your purpose. If you want to avoid creating new samples every time you alter the design, go for a virtual mockup. In addition, if there is something that needs to be revised, you can make the necessary changes right away.
However, if you want to know what the product looks like in the real world, your best option is to make a physical prototype. It is also a good way to check the product’s assembly, color, fit, and durability. Both physical prototypes and virtual mockups can be used at different phases of production. To give you a clear idea about your options, take a look at the table below.
RELATED: How Packaging Design Services Can Help Your Product Stand Out
| Factors | Virtual Mockup | Physical Prototype |
| Time needed for revisions | Changing the materials, colors, background, or artwork is easy. | A new sample is required when you revise the design. |
| Cost | Low after creating the 3D model | Increases as materials, labor, and set-up change |
| Structure | Strong for checking the appearance of the package and how it folds when it is based on a precise dieline | Strong for checking the package’s actual assembly, fit, and feel |
| Material | Imitates materials via lighting and shaders | Can be done by directly touching the package |
| Color | Can be used to determine whether the right colors are used. Virtual mockups shouldn’t always serve as a replacement for a physical prototype. This is particularly important when you have to see how the colors, artwork, and finish will look on the actual product. | Can be used for evaluating the ink and physical substrate |
| Product presentation | You can put the virtual mockup on the sales deck or shelf scene. | Customers can see and touch the actual product. |
| E-commerce use | Expect clean product images at all times. | Extra time and resources must be invested to create physical prototypes. It also requires styling, photography, and inventory. |
| Variant testing | Ideal for creating multiple labels, varieties, and sizes | Require a lot of samples and logistics |
| Handling and shipping | Virtual mockups cannot completely validate the durability of the package. | Physical prototypes can be used for practical testing. |
| Best uses | Virtual mockups can be used during variant review, concept, approval, and pre-sell marketing. | Physical prototypes are suitable during the product approval and final checks. It can also help ensure that the package has the right finish and fit. |
What is the difference between retail-shelf and e-commerce packshots?
Packaging concept design services has an effect on how people view and select products. A retail-shelf render shows how the packaging will be seen when it is displayed in an actual store. An e-commerce packshot, on the other hand, allows viewers to see the product clearly even when viewed on their mobile phones. The product will look attractive and clear, regardless of the device where it is viewed. Thus, the background, lighting, and camera angle for e-commerce packshots depend on the type of render that will be made.
Shelf renders usually use a three-quarter view because it is convenient for showing the front and one side of the product. It shows how customers actually see the product on a shelf. E-commerce packshots show the package in different angles, so it usually includes a lifestyle image and a product shot.
RELATED: Functional and Creative Packaging Designs for New and Existing Products for Companies
The good news is that you don’t have to make a render for every purpose that you have in mind. The same artwork and 3D model can be used to create e-commerce packshots and retail-shelf renders. You only need to change the background, camera, and lighting to create your desired look and effect for each purpose.
How can CGI simulate foil, embossing, soft-UV, and soft-touch finishes?
Adding textures will not be enough to create a realistic effect. That is because lighting can change how the finish looks when it hits the package. Special finishes must look and feel realistic in the 3D model. Here’s how CGI imitates special finishes.
Foil
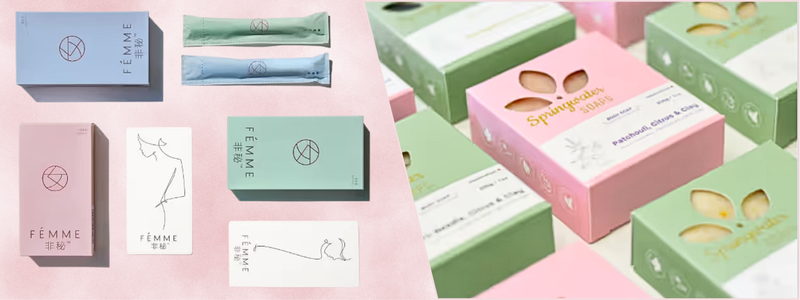
CGI makes the surface reflective and shiny to imitate real foil. It uses light to achieve this effect. Slight differences in reflection and roughness prevent the CGI from looking too perfect. In addition, it is important for the designer to consider whether there’s foil on the logo or text or whether the curved surfaces or edges are also wrapped in foil. They also need to take into account whether the foil is brushed or bright. Alternate camera angles or moving animations can create a more realistic effect than a still image.
RELATED: Top 20 Packaging Design Blogs for Freelance Product Designers
Embossing and debossing
An embossed design sticks out from the surface, while a debossed design is pushed inward. The embossed or debossed design is lined up properly with the printed ink. Rounded edges are also added to improve the realistic effect of this finish. These effects, along with highlights and shadows, require actual depth in a 3D rendering services so that they look real instead of visuals plastered on the package.
Spot-UV
Packages with a Spot UV have both matte and shiny parts. Spot UV adds a glossy finish to a certain part of the package, which helps it stand out from the rest. Thus, it is a great option for logos, product names, illustrations, and patterns.
Soft-touch
This finish has a soft feel and looks slightly velvety and smooth. A soft-touch finish should not look like plastic or shiny. Rather, it should be subtle and matte. The 3D render must have softer highlights to reveal the actual package design.
RELATED: Product Rendering and 3D Visualization – A Full Overview
Creating the right finish depends on the skill and experience of the designer. They should be knowledgeable about 3D tools such as Blender, Substance 3D, and KeyShot. These tools can make the materials, finishes, textures, and lighting just like the real thing. If you need a designer or artist who can create realistic finishes, visit Cad Crowd to find freelancers who specialize in product packaging design services and 3D rendering.
How does packaging CGI improve the approval process?
Packaging CGI can expedite the approval process because everyone on the team, including the retailers, legal teams, brand managers, and manufacturers, can assess the design at the same time. They can check it from different angles, and if they see an issue, they can fix it right away.
What is the ROI of rendering packaging before you print it?
Rendering packaging before printing it offers several benefits, including fewer product samples and earlier approval of the project. Printing new samples can be expensive and take about a week to complete. By rendering the product first, you can set expectations because you can see what the package will look like. Since you don’t have to print samples, you can save printing costs and time. You can reserve the physical sample to check the color and shape of the package in person.
RELATED: Ways 3D Product Rendering Services Can be Used for Marketing Products
In addition, photorealistic rendering services allow you to show what the final product will look like before production. You can also use the 3D images in your crowdfunding campaigns. This shortens the time between design approval and revenue because you can present your product to your team or investors as soon as you are done with the design.
Where can designers find packaging references?
Finding packaging references can help teams find structural ideas that they can use for their project. It also helps the team decide on a particular visual style. Packaging of the World and The Dieline are two of the most popular showcase resources where you can find a large pool of packaging references.
Other useful references include Boxshot, where you can access box visualization samples, and Mockup World, where you’ll find inspiration for general mockups. Pacdora and Packly are good references for online packaging mockups and designs. If you need a specific production structure, you can visit converter and printer libraries.
RELATED: How Is 3D Product Rendering and Visualization Used by Manufacturers and Retailers?
These references can be beneficial for research, but you should not use the templates as the final dieline. Always check with the manufacturer to verify that you are using the correct shape, size, and type of packaging before production.
What should be included in the packaging rendering brief?
Having a clear packaging rendering brief allows the designer to create accurate designs. The brief should include the product category and name as well as the existing dieline or structural design request. It should also mention the type of package and the measurements, the CAD model services, brand guidelines, required finish and image angles, substrate and materials, and final artwork file. The background and resolution requirements must be indicated as well.
Moreover, you should mention the target retail environment, converter, or printer, and platform specifications. If you want to show how the product works through animation, you need to ensure that the brief explains what the animation must show and how you want it to look. Do not forget to indicate the review deadline and approval stakeholders. The brief must also state whether the render will be production-referenced or conceptual.
RELATED: How Virtual Prototypes Are Used By Companies For High Quality Product Development
Always verify that you know who owns the fonts, images, textures, or graphics included in the packaging and that you have permission to use them. Also, make sure that your designer can give you the source model or scene and a PDF of the design that you can review. Cad Crowd is a great place to connect with freelancers who are experienced in creating and cleaning up dielines, 3D packaging modeling, virtual mockups, artwork application, and animation.
Frequently asked questions
- Is a dieline the same as a packaging mockup?
The dieline and packaging mockup are not the same. A dieline refers to the flat template used in making the package and shows where it will be cut, folded, and glued. A mockup refers to the finished, folded package. It can be a 3D visual or a physical sample. In a 3D mockup services, the digital model is based on the dieline.
- Can a 3D render replace a physical prototype?
Although a 3D render can be used as a substitute for a visual sample of the packaging before production, it cannot completely replace an actual prototype. A prototype will still be required to assess and confirm the actual fit, strength, colors, assembly, and feel of the packaging.
RELATED: How To Visualize Consumer Products Using 3D Rendering Services For Your Company and Firm
- What is the best tool for 3D packaging rendering?
There is no single best tool that works for all. The best software will depend on your needs and goals. For realistic product renders, use KeyShot. Boxshot, Pacdora, and Packly can be helpful when creating online packaging mockups.
If you want to make realistic materials and textures, Substance 3D can be a good option. Use Esko Studio for packaging visualization and production artwork. So, think of the final output that you want to create when choosing software for 3D packaging rendering.
- Can CGI show foil, embossing, and spot-UV?
CGI uses different surface details, textures, lighting, and materials to create realistic foil, spot-UV, soft-touch, and embossing finishes. Accurate settings can help you achieve the most realistic final result.
RELATED: How to Render a Product Design with Freelance Experts
- Can brands create e-commerce images before the product is manufactured?
Brands can create e-commerce images before the actual production as long as they clearly define the design, size, artwork, and structure of the product. If anything changes during production, make sure that is reflected in the CGI image too.
Conclusion
It is possible to make an eye-catching 3D render even if you use the wrong dieline. However, there is also a possibility that the packaging will not work as intended once it’s assembled and folded. Using the right dieline from the start allows you to create photorealistic renders as well as test and revise various designs before you print anything. This means you don’t need to print many physical samples. If you need a photorealistic product packaging design, dieline, or 3D model, visit Cad Crowd to find qualified and vetted freelancers who can bring your flat templates to a highly detailed visual presentation.
How Cad Crowd can help
Cad Crowd connects brands and product teams with experienced CAD and 3D rendering professionals who can create accurate packaging dielines, 3D models, realistic mockups, and photorealistic product renders. Whether you need to visualize packaging finishes, test different designs, or prepare images for e-commerce and marketing, Cad Crowd can help you find the right freelancer for your project. Contact Cad Crowd today for a free quote and turn your packaging concepts into professional, realistic visuals.