Hire freelance 3D product rendering designers for your firm
We help companies find 3D product rendering design engineers & modeling consultants on demand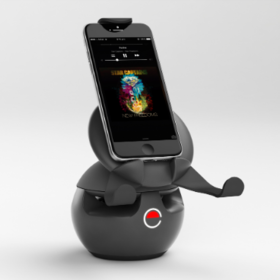
Our freelancers help companies with 3D CAD design and 3D photorealistic renderings
No matter what industry you’re in, whether it’s construction, product design, entertainment, automotive, or aerospace (just to name a few), chances are you’ll benefit from the speed, versatility, and flexibility that 3D design has to offer.
Realistically rendered images enable you to preview how your designs will look in real life without the cost and hassle of producing a real-life prototype. You’ll quickly see why everyone, from multinational corporations to garage-based start-ups, is using 3D CAD design and rendering services as an integral part of the design process.
Cad Crowd offers freelance 3D product rendering and design services, all in one place. You won’t have to worry about looking for an industry-specific 3D designer only to later go hunting for a rendering artist to make the design come to life. We’ll pair you up with world-class vetted designers who can help you get through all stages of the process.
The key to staying ahead of the game, especially in today’s highly competitive global market, is adding as much value as possible to your company and its products, as well as operating efficiently and cost-effectively. 3D CAD design, as opposed to old-school pen and paper drafting, helps companies develop better, more valuable products. It can significantly enhance the quality and speed at which anything from a shoe to a car can be designed.
Furthermore, visualizing through 3D rendering can help you detect possible flaws in the design. You can discover other unexpected and difficult-to-imagine design possibilities, all before spending large amounts of money and time in building a prototype.
Iterating (going back and forth in cycles) between design and rendered images can help ensure that you’ll have the best possible design in your hands, minimizing many of the risks associated with production, and saving both time and money.
What is 3D design, and how does it work?
The word design can be used in several different ways with different meanings. It can be used as a noun, such as when you say, “That’s an awesome design”; it functions as an adjective when used in phrases like, “This is a well-designed building”; and it can also be used as a verb, like when someone says, “I’m going to design the product to your specific requirements.”
Design can also be viewed as a process, one that is of utmost importance in virtually every industry. When viewed as such, design can be defined as the series of steps or phases needed to go from an initial idea or concept to the actual working, implemented solution. Depending on the type of problem faced, the implemented solution could be anything – an image, an infographic, a garment, a piece of jewelry, a building, or even a spaceship.
When we speak of 3D design, we’re talking about a design process involving models that are three dimensional (the 3D in 3D design) as opposed to other types of design like graphics design, which is primarily devoted to generating flat, two-dimensional images. The addition of depth to a 2D image is difficult and very time-consuming if done by hand, so 3D design relies on computers and software to make things easier and faster.
The stages of the 3D design process
There are many different ways to view the steps of the design process. However, one thing that most people agree on is that design is not a linear process that can be broken down into successive steps. It’s more like a series of iterations that take you from problem to concept to model to prototype until you get an acceptable working model for implementation. The whole process can be broken down into three general overlapping stages, as in the image shown here.
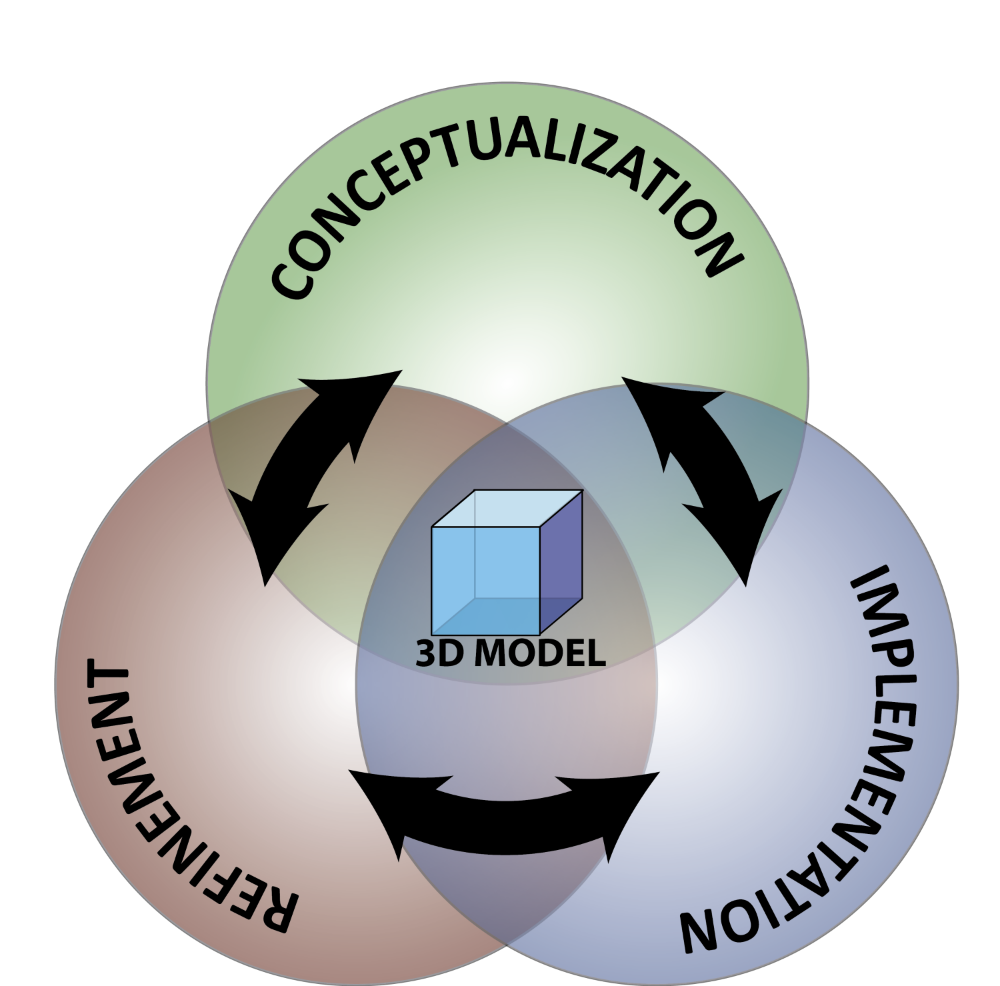
The first stage is conceptualization, where the problem to be solved by the product or design is identified and studied thoroughly to try to identify possible solutions and design strategies. This stage usually involves brainstorming sessions in which one or more designers, as well as the person who commissions the design, quickly toss idea after idea. The result is a series of preliminary designs that are then modeled, visualized, and analyzed in the refinement stage.
During said refinement stage, it is common to discover flaws in the original idea or concept, and it becomes necessary to go back to the conceptualization stage. Other times everything will look good, and you’ll be able to move on to the next step, which involves building a prototype or real-life physical model. This model is also carefully studied and analyzed to detect possible flaws, potential room for improvements, and to see whether it solves the problem it’s intended to address.
Here it may be necessary to go back to the drawing table (or to the computer, more likely) to improve the model or to fix identified design flaws. It may even be necessary to ditch the model altogether and start over from scratch, which is why we say that design is essentially a non-linear process. Only after you have a perfectly functional prototype that meets your expectations will you move on to the implementation phase that encompasses things like production, financing, marketing, documenting, etc.
At the heart of the entire process is the 3D model, because this is where the concept starts to take shape. It’s where all the tweaks and modifications are made to improve the design, and it’s also the basis for prototyping and manufacturing. 3D renderings, which are used in all sorts of documentation and advertising material, are also produced from this 3D model.
This is a simplified view of 3D design, but it helps to know that the design process may involve repeating phases or iterating between design concept, 3D model, rendering and visualization, analysis, and prototyping. Always keep in mind that it’s better to repeat this process here, at an early stage, as many times as necessary. Otherwise, you likely won't find problems until after you’ve already started production when they are much harder and more expensive to fix.
What’s the difference between 3D design and 3D modeling?
Some people get confused when they look for professionals to help them with product development, especially when they must choose between service options like 3D design and 3D modeling, which seem to be quite similar at first. Let’s clear this up a bit before we continue.
3D modeling refers to the process by which a real object or idea is transformed into a mathematical, computer-generated, three-dimensional virtual model. This means creating a representation of said object in a computer, which can then be moved around, analyzed, transformed, viewed from various angles, put in different scenes and, in general, tinkered with and modified in myriad ways.
An expert 3D modeler is someone who will have the ability to accurately and efficiently create a virtual 3D model of an object that looks (almost) exactly like the real thing, or someone who is capable of grasping your concept or idea and building the 3D model based on that for you and everyone else to see on a computer screen.
3D design, on the other hand, encompasses the entire design process including 3D modeling, but also other tasks not necessarily associated with it like conceptualizing, rendering, parts and assembly analysis, manufacturing optimization (prepping for 3D printing, for example), and more.
To get a better understanding, let’s describe a pair of different cases in which you might need one service or the other:
- 1st case scenario: Let’s say you’ve already designed or invented a product and built a working prototype, but you would like to create a 3D model to see how your design will look in different colors and with different textures. In that case, you probably don’t need a 3D designer, because you already did most of the work and went through most of the design stages yourself. Instead, what you’re looking for is a 3D modeler – someone who’ll take your prototype and turn it into a computer-generated 3D model.
- 2nd case scenario: Now, imagine that you invented a new product that works great but doesn’t look the part, and you want to improve your product’s design. Or, let’s say all you have is the concept of how the product is supposed to work, but you haven’t actually designed or built it yet. Or maybe it’s just too expensive to build. In any of those cases, you need a 3D designer who can walk you through the entire process. For situations like these, a 3D modeler simply isn’t enough.
You can probably guess by now that there are critical differences in the skills needed to be a 3D designer and a 3D modeler. Designers tend to think differently than modelers do. A designer will need to think about how to solve a particular design problem and will always be thinking about how to alter or tweak a design to make it better.
This requires a good deal of creative thinking as well as exploratory thinking, and maybe even a bit of scientific thought. Since 3D design implies 3D modeling as one of its process stages, then the designer also needs to be a skilled modeler.
Professional 3D modelers, on the other hand, don’t necessarily have to be exceptionally creative (although most of them are). The skill that they need the most is the ability to use all the software tools at their disposal to create the most accurate model possible. 3D modelers have to know how to make the model look the way you want it to look. They don’t necessarily have to think about how the model should be or how to make it better.
Types of 3D design
Now that we’ve cleared up some of the key concepts related to 3D design, you need to be aware that not all 3D designers are the same. If you’ve decided that you need to hire a 3D designer, then you have to look for the one who best suits your specific industry. There are designers who specialize in the automotive and transportation industries. Others are specialized in architectural design, some are great at mechanical design and engineering, and so on.
You’ll agree that you probably wouldn’t hire an architect to design a car, or a mechanical engineer if you’re designing a house. If you’re developing consumer products, then you'd need a 3D product designer, preferably with an industrial design background. And we’ve got them all here at Cad Crowd.
Popular 3D design software
Regarding software, there are many options available to choose from. Some are more popular than others, some are more powerful than others, and some are way more expensive than others (especially considering that some of them are free). Several of the software solutions are suites of programs that designers can use to do pretty much anything related to computer-aided design (CAD), computer-aided engineering (CAE), and computer-aided manufacturing (CAM). These suites include tools for modeling, designing, rendering, animating, analyzing, testing, and simulating.
You’ve got to have the right tools for the job, and our designers do. Read on to learn about some of the most common software tools our 3D product rendering firms will use to help you with your project.
Autodesk AutoCAD
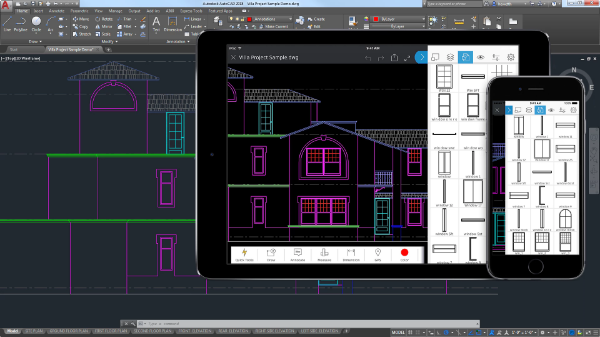
AutoCAD is one of the grandfathers of CAD software tools. It is known the world over for its use in architectural design, but the most recent versions have great 3D functionalities that make it indispensable for modeling 3D objects other than buildings and houses. A 3D product designer who uses AutoCAD will probably purchase the AutoDesk Product Design & Manufacture collection, which uses AutoCAD for 3D modeling and other tools like Inventor (see below) and 3ds Max for CAE, rendering, animation, and manufacturing.
Autodesk Fusion 360

Fusion 360 is a cloud-based 3D design platform especially suited for product development and prototyping. Since it’s cloud-based, designers are able to show you the work in progress virtually, in real time, no matter how far apart you are, provided you have a working internet connection and a compatible web-browser.
This is a particularly useful advantage when hiring a 3D product rendering services designer online, because there’s no real need to set up face-to-face meetings, and you won’t need any fancy software installed on your computer to view the work in progress. It also allows you to make suggestions and ask questions about the design while you navigate around the 3D model, and you can even see in real time how the designer changes the design based on your suggestions. This sort of collaborative working environment makes feedback a lot faster and the overall workflow more efficient. Fusion 360 is AutoDesk’s bet for what many feel is the future of software – Software as a Service, or SaaS.
Autodesk Inventor

Inventor is a very well-rounded app that’s akin to SolidWorks (read below). It’s mainly used for mechanical-parts modeling, simulation, and manufacturing, making it a versatile tool for use in the product design workflow. Not for nothing is it included in the AutoDesk Product Design & Manufacture collection mentioned above.
CATIA
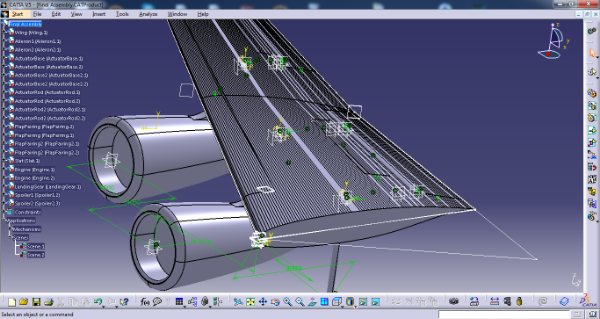
Dassault Systèmes (3DS) is one of the biggest names in CAD, CAE, and CAM software, and CATIA is its crown jewel. This very expensive, very hard to use but incredibly versatile software suite has everything a product designer may need and more. Now, tools do not make the blacksmith, as the saying goes, but if you find a designer who works with CATIA and owns a license, chances are good that you've found a talented, skilled professional. On the other hand, odds are you'll also be charged a pretty penny for these expert-level services, but you get what you pay for.
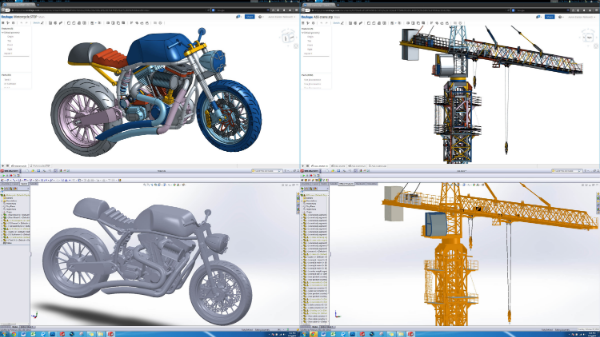
SolidWorks
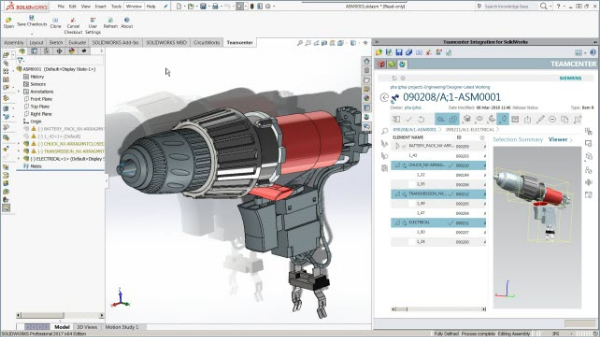
SolidWorks is another software tool for 3D designers that provides everything they need for every single stage of the design process, from initial ideas and drafts all the way to manufacturing. It’s something like CATIA’s little brother but at a much more affordable price. It’s one of the software solutions of choice among 3D designers including, but not limited to, product designers. It even provides cloud services for more efficient collaborative work between design teams, and for better communication and feedback with the client. SolidWorks designers are in high demand because they usually provide the full package when it comes to product design. At Cad Crowd, we have a pool of SolidWorks design service experts ready to begin working on your next great product right away.
OnShape
OnShape is a complete cloud-based 3D design platform developed by none other than the makers of SolidWorks. It’s not as versatile as SolidWorks since it’s mainly a CAD solution and not used for CAE or CAM. Even though some desired functionalities like real-world simulations of your products are not enabled, it does have the same benefits that other cloud-computing applications offer in the areas of collaboration, communication, and workflow. OnShape’s core offering is providing large product-development companies and design firms with analytics tools that will guide important data-driven decision making.
Rhinoceros 3D
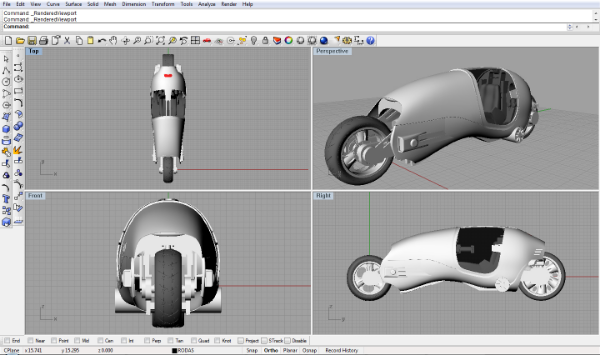
Last but not least, we’ll mention Rhino 6, a reasonably priced, mid-range 3D modeling program that features sketching tools, a decent rendering engine, and manufacturing tools to cover all phases of the design process. It isn’t in the same league as CATIA or SolidWorks, but it can be significantly enhanced by way of plug-ins and add-ons.
These are just a few of the software tools that 3D product rendering services companies can use to make your vision come true. There are many more out there, but in the end, what counts the most is the skill and experience that a designer has with using them.
Now that we’re clear on 3D design, let’s talk about 3D rendering.
3D rendering services and product visualization
We've already given an overview of what rendering is all about, but it’s time to provide a more formal definition: 3D rendering can be defined as the process by which a 3D CAD model is transformed into a 2D image. These images can be shown on computer screens, exported as image files in different file formats, or used as frames for 3D animation.
Depictions of 3D CAD models are initially often just wireframe or polygon models, but they are useful for showing the shape or form of a design in different perspectives. (These initial likenesses are often called pre-images.) The process of 3D rendering transforms an unrealistic-looking model of an object or product into a more refined-looking image.
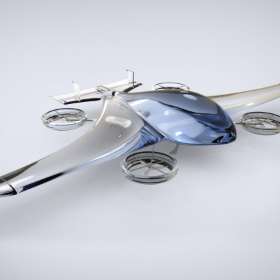
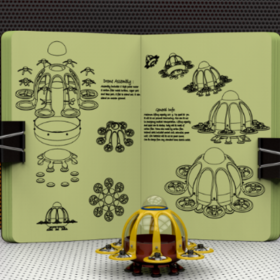
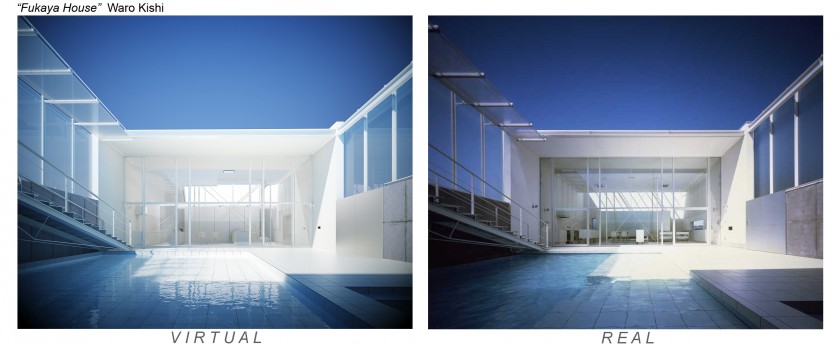
There are two different trends in rendering: Photorealistic and non-photorealistic (also known as artistic rendering). The latter is mainly used in part of the gaming and animation industries where a cartoonish appearance is desired, and it's also used by 3D artists looking to create unreal and abstract effects. In product design and development, however, photorealistic rendering is the name of the game, and rendering artists and their software tools are becoming ever more efficient at it (see image below).
If you thought that creating complex 3D models and moving them around was difficult on your average computer, that’s peanuts compared to the resources required by high-resolution photorealistic rendering. To give you some insight into the matter, rendering a relatively complex model with lots of texture and physical light simulation would take from hours to days in your average home computer.
There are situations that require real-time rendering, such as 3D video games and virtual reality (VR). The need to produce 30 to 40 rendered frames per second limits the obtainable quality of the result. However, the fast pace at which graphics technology advances means that we’ll get better and faster renderings as time goes on.
Uses and advantages of 3D rendering
As a product developer, what can you get out of 3D rendering? Why should you bother hiring a rendering artist? Here's a summary of the key benefits of rendering photorealistic images of your product's 3D models:
- Product visualization. 3D rendering allows you to see what the finished product will look like before manufacturing even begins. This will let you assess the aesthetics of the design as well as identify design flaws and potential room for improvement. It can also let you experiment with different colors, textures, and materials, all before ever building a prototype, saving you both time and money.
- 3D animations of your product in action. You can use 3D rendering to produce animations showing how the product will work and move in real life to test functionality before construction. You can also use these animations to see how parts fit together or come apart during assembly or disassembly processes.
- Marketing material. 3D renderings can be cost-effective alternatives to photoshoot set-ups with the real product. These static images can then be used for advertising material, flyers, e-commerce imagery, and more. The same can be said about 3D rendered animations.
- Funding for your project. Sometimes small start-ups have million-dollar ideas but lack the financial support to build even the first working prototype of their product. 3D rendering can be used to show how your concept would look and work once built.
These are just a few of the most important benefits you can get from hiring the right rendering talent, but how do these artists work their magic? Read below to find out how rendering works, what the most common rendering methods are, and what software packages rendering artists use to get the best results.
3D rendering methods: How does rendering work?
Rendering starts with the completed 3D model of your product, so to get a rendered image, you already have to have the 3D file where said model is stored. The rendering software reads the file, interprets the information as a three-dimensional object, and produces a very basic rendering to show you a simplified (wireframe or polygon) 2D image of your model in the computer screen, called a pre-image. By the way, all CAD or modeling software does this sort of rendering as you build your model or design, so this is not what we refer to when we say rendering.
This “flattening” of a 3D object is called 3D projection. Projections can be created either in perspective (the farther away, the smaller the parts of the model will look) or by orthographic projection, in which all dimensions and proportions are maintained.
After the pre-image is displayed, rendering is used to add as much detail as possible to make it look the way you want, be it photorealistic or artistic. These details are added in the form of many different visible features that give an image its character and make it look realistic.
Most of these features are a consequence of the physical behavior of light and the way it interacts with the different surfaces and materials in the 3D model, like shading (an object's surface brightness), shadows (areas where light doesn't reach), transparency, translucency, reflection, refraction, diffraction, etc. Other details can also be added to surfaces, like texture mapping and bump mapping.
Different computer algorithms have been developed to simulate all or most of these features in a more or less efficient and accurate way. The most commonly used by rendering software are:
Ray casting
Ray casting is probably the grandfather of 3D rendering, dating back to 1968. With this technique, the color and intensity of each pixel in the image are sampled and calculated from the intersection of a ray that has been cast from the observer through that pixel (therefore, the name ray casting), with the first object that crosses its path in the 3D scene.
In its simplest form, the color of the pixel in the image will be made the same as the color on the surface of the 3D object that intersected the ray. This color could be a solid color, or it could be made more complex by using texture-mapping. In ray casting, all rays of light are considered to travel in straight paths; therefore, physical phenomena like reflection, refraction, and diffraction cannot be taken into consideration directly.
Consequently, features such as shadows cannot accurately be modeled through ray casting, but have no fear – they can be “faked” to a degree with said texture-mapping techniques. Due to its low number of needed calculations, this is the fastest and easiest way to render a 3D image. However, it’s also the least accurate and realistic.
Scanline rendering
This method belongs to a more generalized type of rendering called rasterization. In this technique, instead of rendering each separate pixel of the image you want to create (like in ray casting), the algorithm focuses on parts of the 3D model called primitives. In most cases, these are the triangles and polygons that make up its surface.
The algorithm then calculates which pixels in the image will be affected by which primitives and renders based only on the light coming from each primitive, instead of rendering the whole set of pixels. In scanline rendering, all the polygons in the 3D scene (in your product’s 3D model) are ordered according to their vertical position and classified into rows, from top to bottom.
The algorithm scans each row or line and discards the polygons that are at the back and no longer visible by the observer. Since there are usually fewer primitives (polygons) than pixels, normal rasterization is usually a lot faster than ray casting. Since in scanline rendering, many of the primitives are discarded and not taken into account during calculations, this type of rasterization is even faster.
Scanline rendering is one of the most efficient rendering techniques. This is why it’s the algorithm most often used for hardware rendering in GPUs, and it’s used in many applications that require real-time renderings like VR, interactive scenes, and 3D video games. However, it fails to include complex light effects because it merely projects objects to the image plane geometrically, and therefore it sometimes falls short at creating highly realistic images.
Ray tracing
This is one of the most computer-intensive types of rendering, but it’s also the one that gives the best, most realistic results. The reason is fairly simple: Real-time ray tracing (RTX) treats light rays as particles that travel through the virtual 3D space and interact with the scene, and the 3D models therein, in the same way they do with matter in the real world. As a consequence, images rendered this way will be very photorealistic.
In the real world, when a beam of light (a ray) from a light source hits the surface of an object, it interacts with it in different ways. It can be absorbed, reflected, diffracted (deflected by passing near the edge of an object), or refracted (deflected by passing from one medium into another).
As a consequence, a single beam of light can spawn many secondary beams that can travel in different yet predictable directions. Each one of these beams then travels around and hits another object, and the whole process happens again. The image that you actually see results from the sum of all the light rays that have made it to your eyes after all those interactions, as well as the light coming straight from the source.
The ray-tracing technique simulates this process. As its name suggests, this method consists of tracing the path of each one of the primary (originated at the source), as well as secondary (originated after reflection, refraction, etc.) rays. Each pixel in the rendered image results from the integration of all the rays, coming from many different directions, that coincide in that particular pixel.
The algorithm has to calculate the path and all the physical interactions of every single ray that is produced by the light source, and of all the secondary rays spawned after each interaction. On top of that, it must solve an integral equation involving all rays of light that make it to every single pixel of the rendered image.
You can probably see by now why this sort of rendering is very time-consuming. It’s only recently been used for high-end, real-time rendering (thanks to better CPUs/GPUs and more efficient algorithms) and it’s scarcely used for short-film animations because each frame takes such a long time to render. However, it’s probably the best choice when it comes to producing vivid, highly photorealistic still images or very short animations to impress potential investors or prospective clients.
By the way, since this is the method that best simulates reflection and refraction, it does a very good job at simulating transparent or translucent materials such as glass, crystals, or liquids. So, if your product includes any of these materials (like jewelry, for example), this rendering technique is the way to go.
Radiosity
More than a rendering technique per se, radiosity is a way of simulating the diffuse scattering of light from shiny surfaces to be used in rendering as secondary sources of light. This helps to accurately model complex shades and shadows. Radiosity algorithms are sometimes programmed into ray tracing rendering algorithms to increase the level of realism in the final image, but at an increased computational cost.
These are just some of the main techniques that rendering software packages use to produce a 2D image of a virtual 3D model or scene. Ray tracing, radiosity, and more recent light-modeling algorithms like path tracing, photon mapping, and ambient occlusion are referred to as a group by the common term global illumination algorithms.
Ray tracing and radiosity simulation made their debut in the early 80s, and it’s safe to say that technology has come a long way since then. However, most advances in rendering technology have been made in the areas of quality improvement and global illumination efficiency.
In some cases, improvements have been made by combining the rendering techniques shown above to make rendering more efficient without sacrificing quality. In other instances, advancements have involved the development of programs dedicated to the modeling of complex shades or the simulation of subsurface scattering, to name just a few.
3D rendering software/rendering engines
As mentioned above, all the calculations needed to produce a rendering are done by computer programs referred to as rendering engines. Being skilled in the use of software tools and all their features and functions is the hallmark of professionals working at a 3D product rendering services firm. But which rendering engines are they most likely to use?
3D design programs or software packages will often include a rendering engine of its own. This is considered necessary because rendering is an integral part of the design process. These rendering engines (which are integrated into 3D design software suites like CATIA, SolidWorks, and others) are sometimes referred to as native or built-in rendering engines. The higher-end suites carry powerful built-in rendering engines but are also very expensive. In the mid-market or lower-end software packages, however, the native rendering engines will sometimes be mediocre or good in the best of cases, but seldom great.
In order to get the best results at an acceptable price, rendering artists will choose either a stand-alone rendering app or an app that serves as a plug-in for the 3D design software packages they already use.
You want the professionals at a 3D product rendering company to have the best tools for the job at their disposal. As you read below, you’ll find out what stand-alone or plug-in rendering engines your designer is most likely to use.
KeyShot
KeyShot is rated by many as one of the best rendering engines for product design. Its most popular features include its:
- Ease of use
- Real-time previews of changes made to the model,
- Ability to classify materials by type with different controls, and
- Ability to choose the number of processor cores to use while rendering.
Like most modern renderers, KeyShot includes global-illumination algorithms that make it capable of producing top-notch renderings. Its default settings produce great-looking results that will make it a breeze to get your first high-quality rendered previews.
Another benefit of using KeyShot is its compatibility, which is excellent. It allows importing of many different 3D file formats, which makes for greater overall workflow efficiency. The only drawback is that this renderer uses only the CPU, and not the GPU, for all calculations, which means that the designer is limited by the speed of the central processor, no matter how many graphics cards are installed in the computer.
SolidWorks Visualize
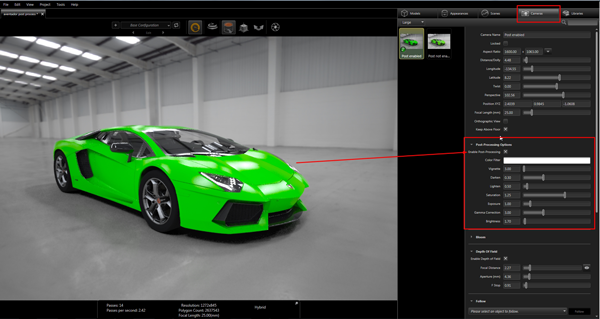
As mentioned earlier, SolidWorks is one of the big names in 3D design software. This amazing suite has everything you might need, and it used to include its own rendering engine as an embedded application. Nonetheless, Dassault Systèmes made it a stand-alone app that has an intuitive user interface, great functionality, and a decent materials and textures library. It also has excellent integration into the SolidWorks workflow.
Visualize also has the ability to show, in real time, a preview of how changes made to the design will look once rendered. This is especially useful because you won't have to wait for a full rendering whenever you want to try out new materials, colors, and textures for your product. All and all, this is an excellent solution for product rendering, especially if your designer/rendering artist used SolidWorks when designing your product in the first place.
3ds Max Design
This software package is a very versatile, function-rich program that has a more than decent rendering engine. 3ds Max isn’t actually a rendering engine in itself as much as a design suite, but it's included here because its rendering and animation tools make it a great choice to create product beauty shots tailor-made for marketing or attracting potential clients and investors.
It’s not an easy-to-use app, but once mastered, there’s no end to the possibilities. A product designer who is well versed in 3ds Max Design can create product renderings and animations that may give you an extra edge over your competition.
Flamingo Plug-In for Rhino
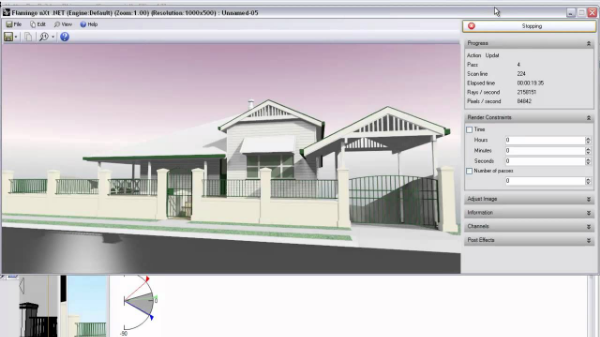
Flamingo is a rendering engine plug-in for Rhino. It enables Rhino users to preview designs live, as they model. It can also be used for the final rendering of a model or scene; however, it doesn’t produce the best renderings. Hiring a designer/renderer who only uses Flamingo for product renderings usually means trading off quality for a lower rate.
Autodesk Alias

Alias is AutoDesk’s dedicated industrial-design and product-design platform. As in the case of 3ds Max, this isn’t merely a rendering engine but a complete design suite for the product development industry as a whole, and the automotive industry in particular. It's included here because of its ability to render highly realistic images of products and cars.
Its rendering engine excels at neatly and accurately rendering curved surfaces of different materials with different finishes and textures without any visual artifacts. This is one of the go-to apps of automotive designers, so if that’s what you need, make sure they have it.
V-Ray
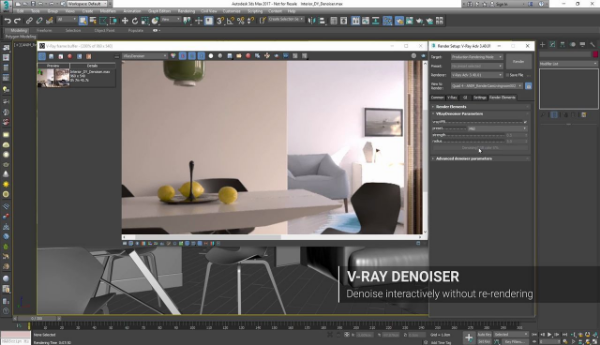
V-Ray by Chaos Group is among the best rendering engines out there. It’s one of the most frequently used rendering software solutions by top names in the product design industry. Its users highly appreciate it, and it can be used for anything from product rendering to the architectural modeling of big cities.
It provides all the tools a designer/rendering artist needs in order to produce anything from a cartoonish image to a hyper-realistic rendering that would make anyone believe the image is actually a photo. Newer versions include real-time rendering and integration with software like 3ds Max, Maya, Modo, Rhino, and SketchUp Pro. Even though it’s mostly used in architectural design, this is a rendering powerhouse that’ll work correctly with any 3D model.
Octane Render
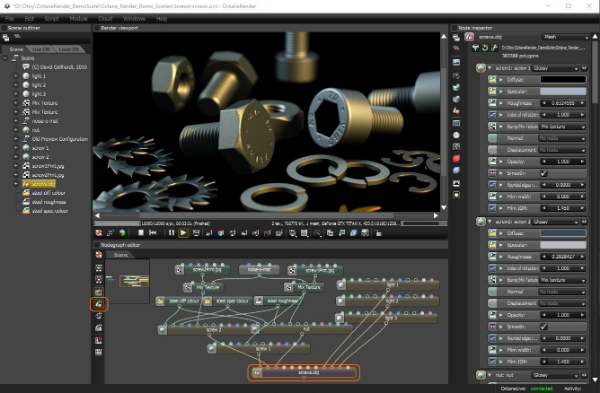
This is an excellent physically based rendering engine that employs a large number of algorithms to produce stunningly realistic results. It simulates spectral light transport, direct and unbiased lighting, and ambient occlusion. Its architecture is GPU-based, so it can harness the full power of the most recent graphics hardware and provide rendering speeds over ten times faster than CPU-based rendering engines.
Octane Render provides you with the opportunity to create your own materials with specific optical characteristics, including sub-surface scattering. With available plug-ins for more than 21 different 3D design programs and suites, it is easily one of the best options for product rendering
There are other tools available for producing high-quality renderings, but these are some of the most popular choices. It’s wise to inquire which programs your rendering artists will be utilizing, as this might give you an initial idea of the possibilities and limitations you may encounter later on.
Click here to learn more about 3D product rendering and design!
Hire the best 3D designers and rendering artists for your company’s products
Here at Cad Crowd, we work with the most talented freelance designers from all corners of the world. Get a quote today and find out for yourself why internationally acclaimed consumer-product companies like Tupperware and Tiffany trust our freelancers to design and render their products.
If you think Cad Crowd is just another online marketplace for freelancers and clients to connect, think again. Our business model is specially tailored to all branches of the 3D design industry. Learn more about how we take special care in the protection of our clients’ intellectual property, while at the same time providing every service needed for product development, from conceptualizing to manufacturing, and from licensing to patenting.
Are you unsure how your product should look and do you want to explore as many options as possible? No problem – we’ve got you covered! Just post a crowdsourcing design competition and wait to see what our designers come up with. You’ll get dozens of entries, and you’ll only have to pay for the designs and concepts you like.

Brands we've worked with


Skills similar to 3D Product Rendering and Design
- 2D AutoCAD Designers
- 3D Modeling Designers
- 3ds Max (3D Studio Max) Designers
- Adobe Photoshop Designers
- ANSYS Designers
- AutoCAD Designers
- Autodesk Fusion 360 Designers
- Autodesk Inventor Designers
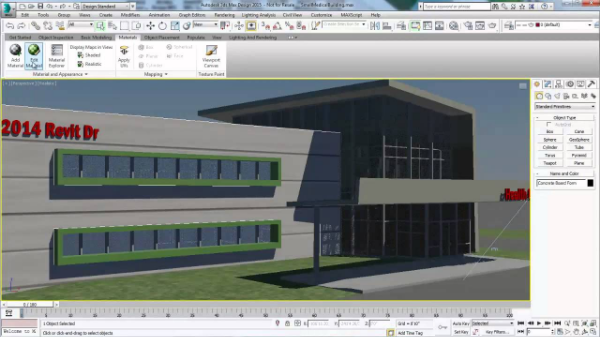
- Autodesk Revit Designers
- CAD Designers
- CATIA Designers
- Design Engineer Designers
- Drafting Designers
- Mechanical Design Professionals
- Mechanical Engineer Designers
- Mechanical Engineering Designers
- Product Design Professionals
- PTC Creo Parametric / Pro-E Designers
- Rendering Designers
- SolidWorks Designers
- Trimble SketchUp (Google) Designers