I will create realistic 3D renders for products with Blender and Maya


About this service
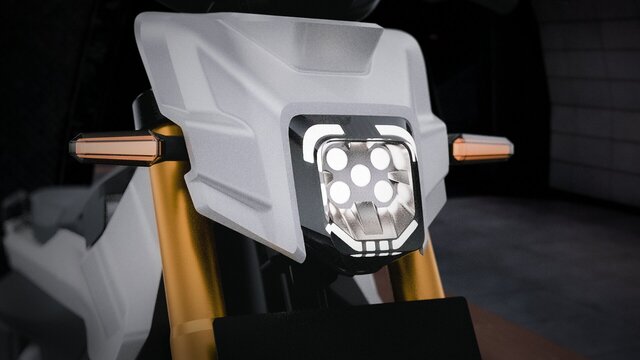
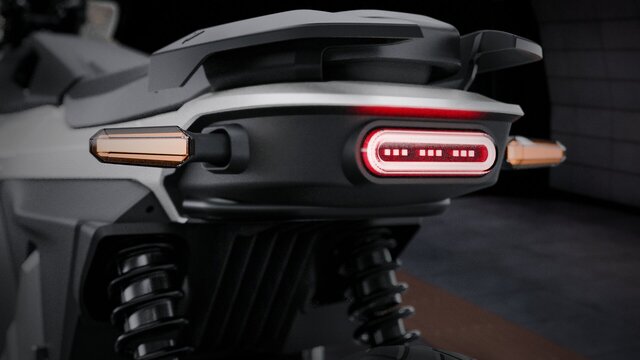
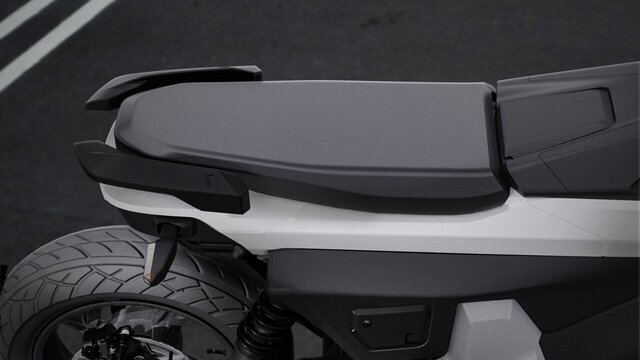
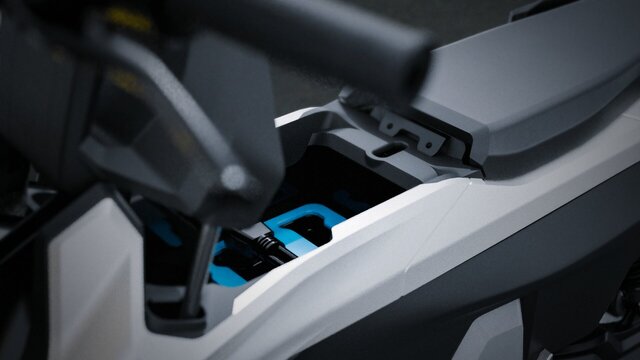
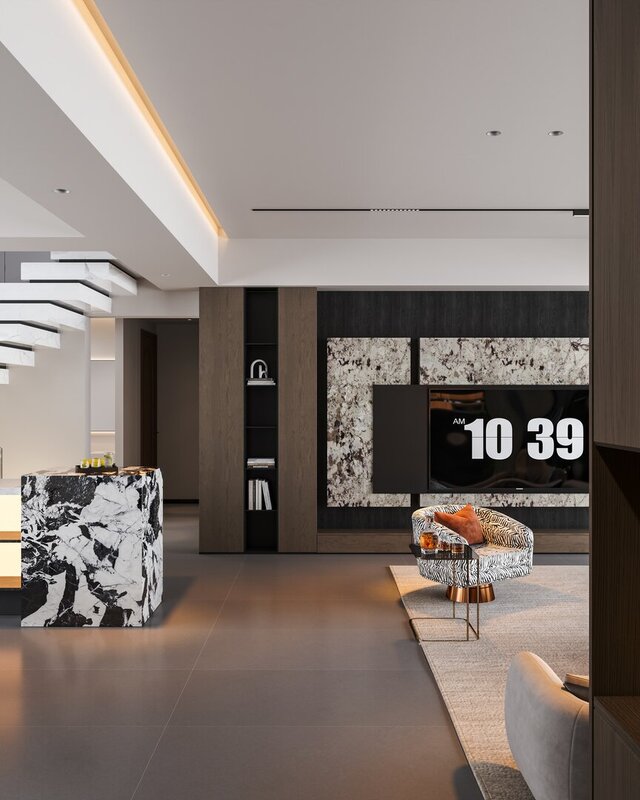
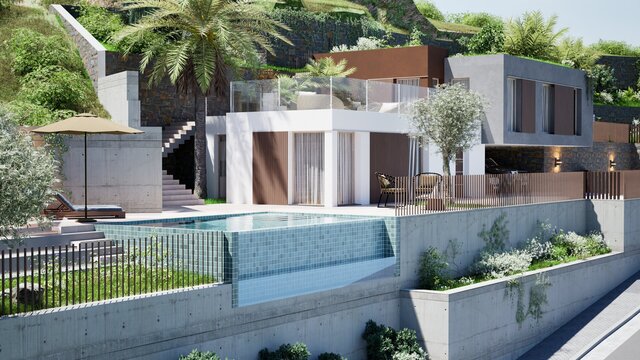
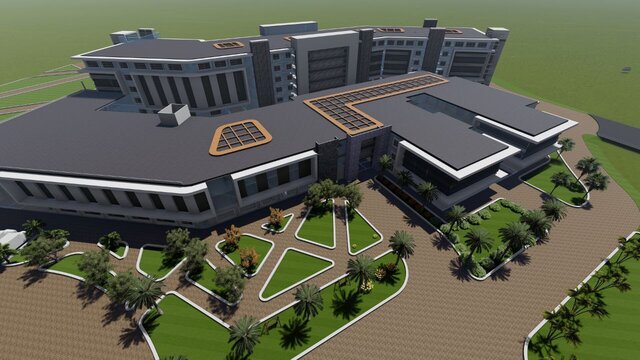
Creating 3D product renders involves building a photorealistic 2D image from a 3D model, allowing for complete creative control over lighting, materials, and angles without needing a physical photoshoot. This process typically involves modeling the product using software like Blender or Maya, adding textures (PBR materials), setting up lighting (often HDRI), and rendering.
Here is a breakdown of the process and tools to get started:
The 3D Rendering Workflow:
- Modeling: Creating the 3D representation of the product, often based on CAD files (STEP, IGES, STL) or reference photos.
- Texturing & Materials: Applying realistic surface properties, such as metallic, plastic, or wood textures, often using PBR (Physically Based Rendering) maps for realism.
- Lighting: Simulating realistic environments using HDRI (High Dynamic Range Imaging) to create accurate reflections and shadows.
- Camera & Scene: Setting up the camera angle and focal length for the best presentation.
- Rendering: The final step where software computes all previous steps to produce the image.
- Post-Production: Touching up the final image in tools like Adobe Photoshop for color correction and fine details.
Creating 3D product renders involves building a photorealistic 2D image from a 3D model, allowing for complete creative control over lighting, materials, and angles without needing a physical photoshoot. This process typically involves modeling the product using software like Blender or Maya, adding textures (PBR materials), setting up lighting (often HDRI), and rendering.
Here is a breakdown of... read more
Here is a breakdown of... read more
Creating 3D product renders involves building a photorealistic 2D image from a 3D model, allowing for complete creative control over lighting, materials, and angles without needing a physical photoshoot. This process typically involves modeling the product using software like Blender or Maya, adding textures (PBR materials), setting up lighting (often HDRI), and rendering.
Here is a breakdown of the process and tools to get started:
The 3D Rendering Workflow:
- Modeling: Creating the 3D representation of the product, often based on CAD files (STEP, IGES, STL) or reference photos.
- Texturing & Materials: Applying realistic surface properties, such as metallic, plastic, or wood textures, often using PBR (Physically Based Rendering) maps for realism.
- Lighting: Simulating realistic environments using HDRI (High Dynamic Range Imaging) to create accurate reflections and shadows.
- Camera & Scene: Setting up the camera angle and focal length for the best presentation.
- Rendering: The final step where software computes all previous steps to produce the image.
- Post-Production: Touching up the final image in tools like Adobe Photoshop for color correction and fine details. read less
Service offer categories
3D Rendering Services
3D Commercial Rendering
3D Product Rendering and Design
Software & skills
3D Modeling
Adobe Photoshop
Blender
Lighting
PBR Texturing
Rendering
+3 more
This service includes
| Service tiers | Simple $15 |
|---|---|
| Summary | 3D Realstic product render |
| Details | Creating 3D product renders involves building a photorealistic 2D image from 3D |
| Delivery time | 4 days |
| Number of revisions | 1 |
Member since
October 2025
Languages
English,
Indonesian,
Spanish,
Chinese,
German,
Russian
Avg. response time
1 hour
Automotive & Industrial Designer | Product Development Specialist
I’m an Automotive & Industrial Design Engineer specializing in Reverse Engineering CAD, Class A Surfacing, and End-to-End Product Development (N2N). I apply Detailed Engineering Design (DED) and Design for Manufacturing (DFM) principles to ensure every part is aesthetic, functional, and production-ready for injection molding or metal fabrication.
With experience in vehicle and industrial product... read more
With experience in vehicle and industrial product... read more

Cad Crowd Billing Security policy
Service quality is protected by Cad Crowd Billing Security policy.
More from Muhammad B.
More similar services
See related services
- 3D Design services
- 3D Modeling services
- CAD Design services
- 2D & 3D Design services
- 3D CAD Design services
- 2D & 3D Modeling services
- CAD Modeling services
- Drafting services
- AutoCAD services
- 3D Models services
- Mechanical Design services
- Product Design services
- Mechanical 3D Design services
- Rendering services
- 2D Drafting services
- Design for Manufacturing services
- 2D Drawing services
- 2D AutoCAD services
- CAD Drafting services
- 3D Product Design services
- 3D Rendering services
- Architectural Design services
- Rendering 3D Design services
- SolidWorks services
- 3D Solidworks services
- Mechanical Engineering services
- 3D Rendering and Modeling services
- 2D & 3D Drafting services
- 2D/3D AutoCAD services
- 2D & 3D Modeling Solidworks services
- 2D & 3D Architectural Design services
- Floor Plans services
- 3D Visualization services
- Industrial Design services
- Interior Design services
- Mechanical Engineer services